
You’ve made a great decision in choosing to have EPA-registered TAP® Pest Control Insulation installed in your home. In addition to killing self-grooming insects, you can also expect the thermal and acoustical properties of TAP® to increase the comfort of your home. Not sure what to expect? Let’s take a look at the TAP® Installation Process!
Step 1: Inspecting Your Attic
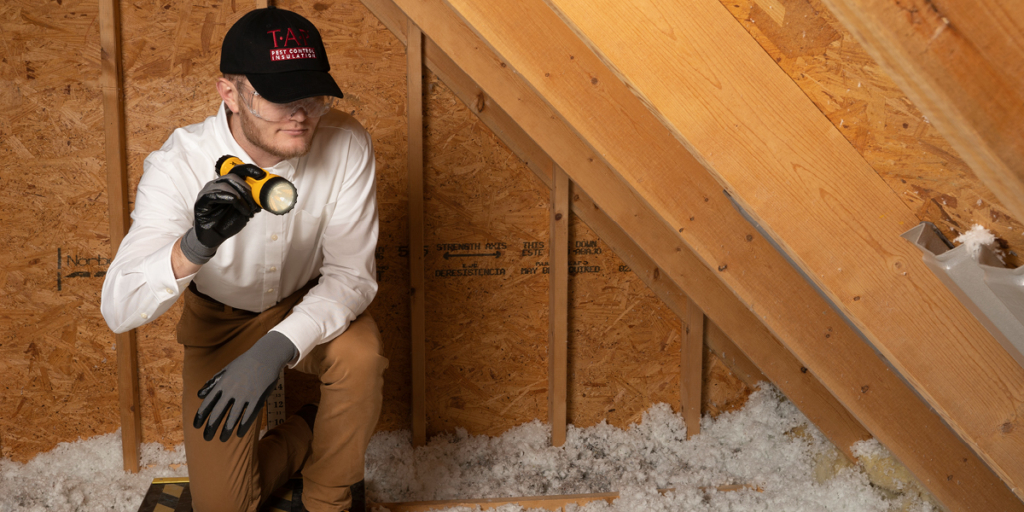
Before TAP® can be installed in your home, your attic must be inspected. This inspection will give the installation team information that they will need for the install such as the number of bags needed, the location of any heat sources that may need to be blocked off, insight into the attic’s ventilation, and the condition of the existing insulation.
At the close of the inspection, the pest management professional will make a recommendation to either remove your old insulation before adding TAP® Pest Control Insulation or to simply add a cap of TAP® Pest Control Insulation directly over your existing insulation.
TIP: Be sure to take a look at the US Department of Energy R-Value Map to help you determine the recommended R-value range for your area.
Step 2: Protecting Your Home
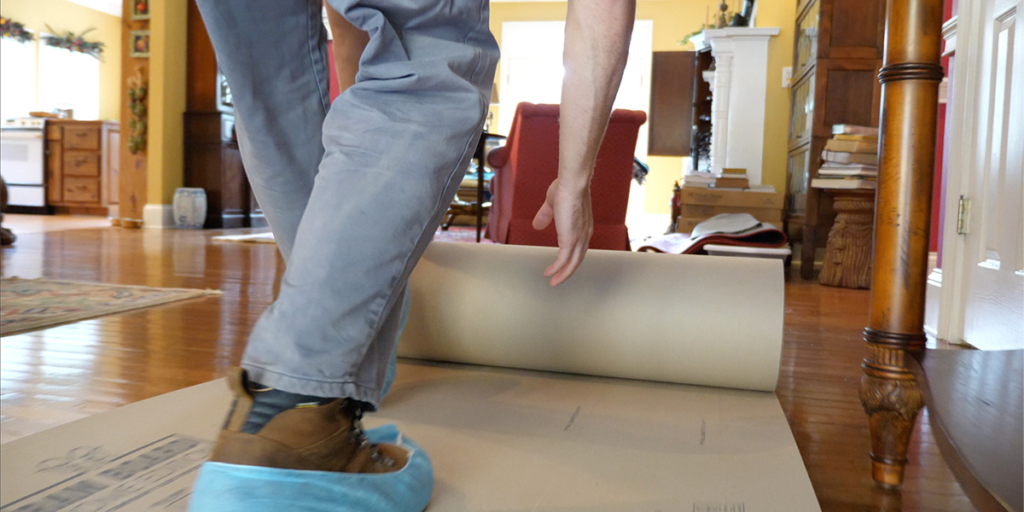
On the day of the install, be sure to leave ample room in your driveway and in the street directly in front of your house for the installation crew to park their vehicles. These vehicles contain specialized machines required for the job. While the machines will remain on the truck or trailer, the crew may place other objects on your driveway as they prepare to install.
TIP: If you are concerned about the weight of the vehicles that will be parking on your driveway or in the street directly in front of your house, it is okay to notify the install crew of your concerns prior to your installation appointment.
TIP: Please place pets in a secure location while the install crew is in your house. While TAP® Pest Control Insulation is approved for use around humans and pets, pets may get tangled up with the install crew if they are free to wander your home.
Step 3: Preparing Your Attic
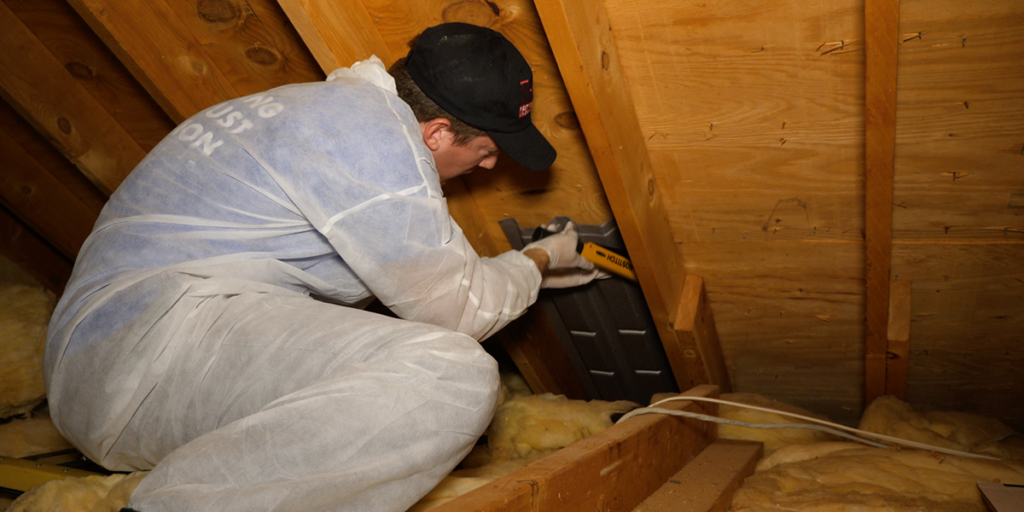
After protecting the living areas of your home, the installation crew will begin work in your attic. The crew will create barriers around any heat-producing sources and will ensure that none of the ventilation in your attic will be blocked by the newly installed insulation. They will also install attic rulers to assist them in installing an even layer of TAP® Pest Control Insulation in your attic.
TIP: At this point, we recommend that you turn your HVAC unit off and leave it off for approximately two hours after the TAP® installation process has been completed.
Step 4: Installation
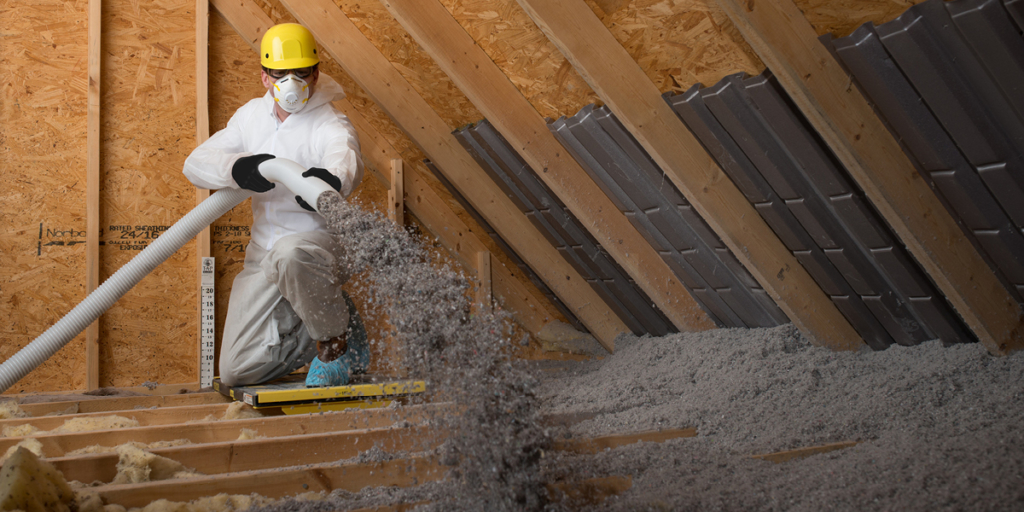
Once your home and attic are prepped, the installer will run a 3-inch hose into your attic. The specialized machinery that the install team uses is typically run off of household power and requires inputs from two different circuits. The crew may ask which receptacles are the best for them to utilize.
Typically, there is one crew member in the attic blowing the insulation and one crew member loading the insulation and operating the insulation machine.
The installation crew will try to minimize the amount of dust, however, there may be a small amount that settles near the attic’s entrance. Once the installation is complete, the crew will clean up after themselves.
TIP: Your attic may be cramped and can reach extreme temperatures. Your installation crew will take several water breaks to ensure their safety and the quality of their work.
Step 5: Clean Up & Quality Control
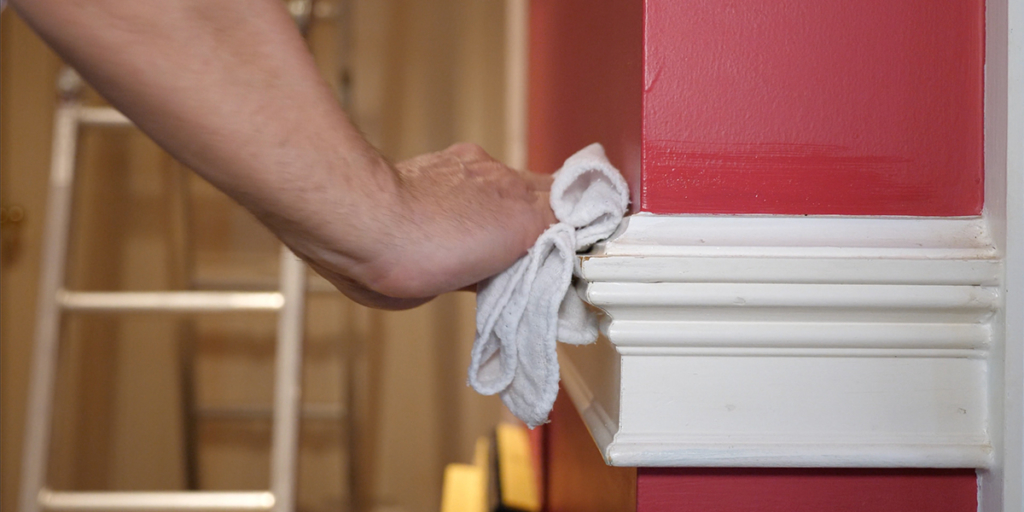
Once the installation is complete, the crew will re-inspect the attic to ensure that there is an even spread of insulation that is equal to the initial agreed upon R-value. The crew will then clean up after themselves.
TIP: If there is dust that was missed by the crew, a damp cloth will do the trick to cleaning it up.
Step 6: After the Install
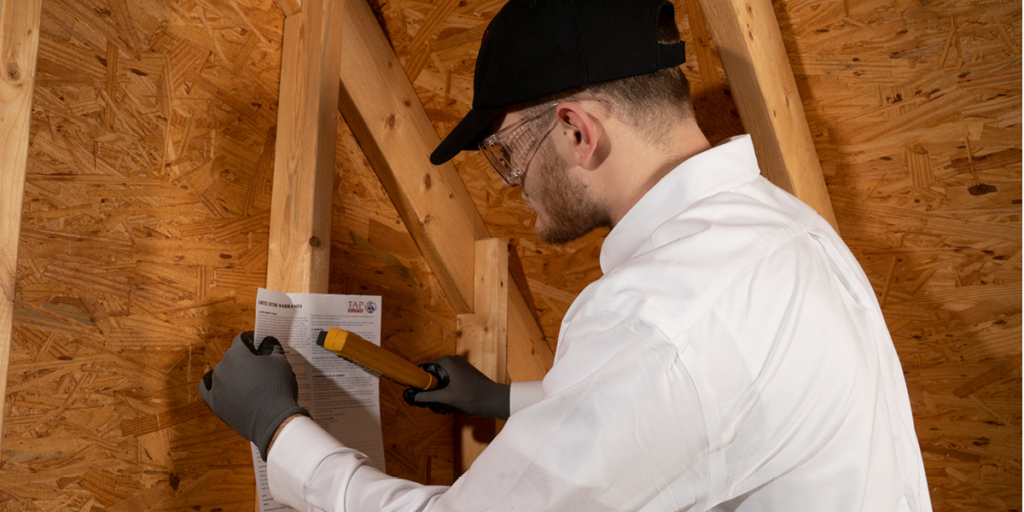
Once the installation has been completed, a warranty or attic card will be placed inside the attic’s entrance for your future reference. The warranty also includes the amount of TAP® Pest Control Insulation installed and the new R-value. If you plan to apply for any rebates, the information that you will need is located on the warranty.
TIP: If you have questions about the TAP® Installation Process, just ask!
Looking for a TAP® Provider near you? Contact us!