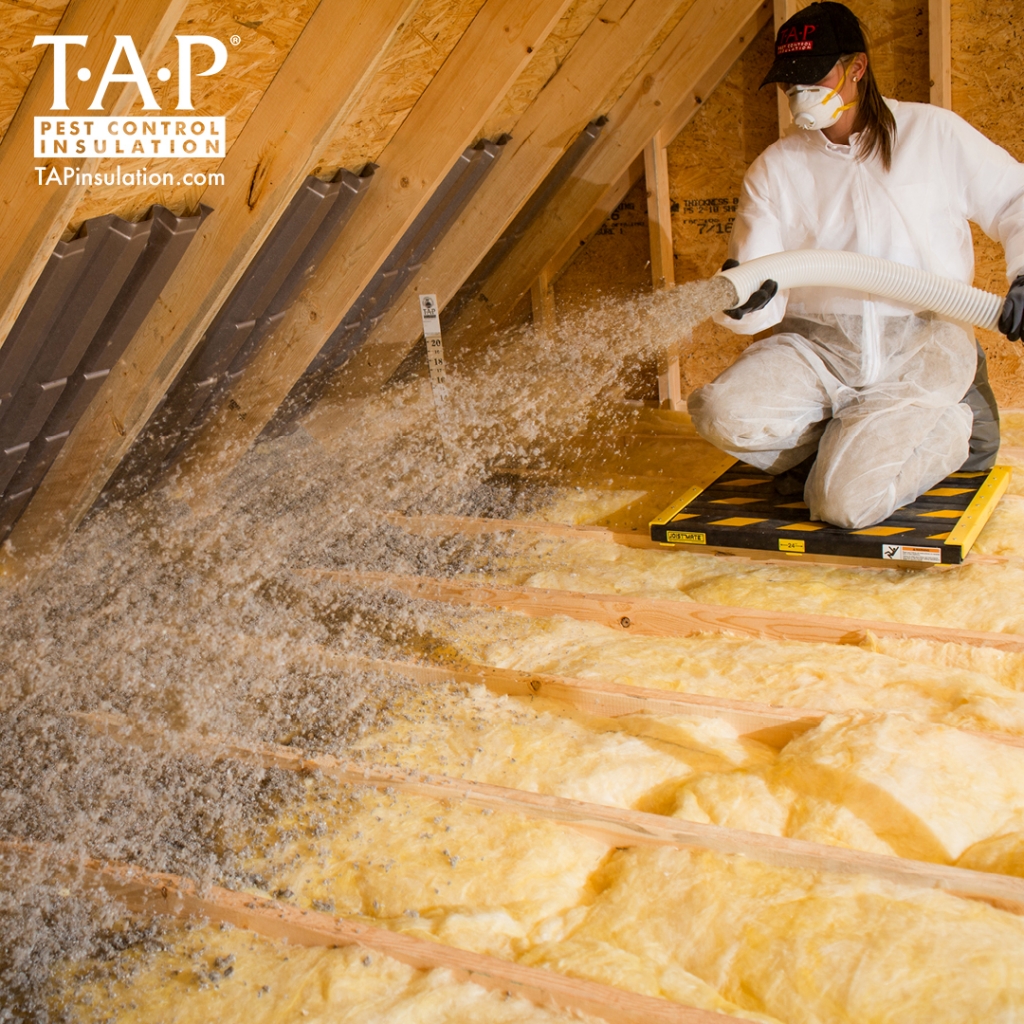
Consider the following 8 basic installation tips for the installation of EPA-registered TAP® Pest Control Insulation once the attic is prepped to help make the job easier, safer, and more efficient.
1. A Path and Plan
Plan where to stand to get the best coverage for the install. Start at the furthest point from the exit to avoid being boxed in a corner. Find a strategic spot to install from where a large area can be covered without having to move around much. Drop a Joistmate attic safety platform there. Repeat this process until the entire attic space is covered. This creates a path and a plan.
2. Install Attic Rulers
TAP® Attic Rulers are designed to visually help technicians install the specified amount of TAP® Pest Control Insulation across the entire attic. Of the 8 basic installation tips, this might be the most critical as it helps with the overall install. The rule of thumb is to tack-up one ruler per every 300 sq. ft. of attic space. However, it’s best to tack attic rulers up everywhere needed.
Prior to the actual install, walk the attic and visually look for key areas where attic rulers should be placed. Pay attention to where sight lines fall or obstacles obstruct the attic floor space. In addition, use a brightly colored marker to highlight the targeted depth or R-value on the ruler for the installation. This makes it easier to see the depth goal during the install.
3. Light It Up
Proper lighting makes it safer to see where to step and the proper level to install. Even with standard lights in an attic, LED headlamps are a great asset. Positioned on the technician’s head, the headlamp creates a visual path for safety.
4. Extension Poles
Eliminate excessive walking across the attic with the use of an extension pole. This can be as simple as using a broom handle or more elaborate by using an adjustable painters pole. Simply duct tape the hose to the end of the pole. Adjustable poles are the most versatile as they allow the pole to be extended to the furthest point and retract throughout the install. The adjustable poles also make it easier to move through the attic by fully retracting it when necessary.
5. Use the Hatchmaster Attic Stairway Cover
Not only does the Hatchmaster Attic Stairway Cover help customers save energy after the completed TAP® Pest Control Insulation installation, it also helps keep dust out of the customer’s home during the installation. Before running the insulation hose into the attic, install a Hatchmaster. Run the hose through the opening and use the dual zippers to close the hatch around the hose minimizing dust and other particles from entering the living space of the home. This also makes clean up easier.
6. Stay Level (At Most)
Coverage charts on the back of the TAP® Pest Control Insulation bag are created using proper and specific installation techniques. Ideally, hold the hose at a 45-degree angle from the floor. This allows the material to flow from the hose and gently fall to the floor. However, many attics have low ceilings which makes this difficult to do without having the material hit the roof’s deck. Adjust that angle downward but never more than level with the floor. Avoid pointing the hose downward as this direction causes the material to ‘pack’ itself. The result is higher than the specified coverage rates. The reason many jobs use more than expected bag counts is a result of pointing the hose toward the floor.
7. Adjust for Dust
Cellulose insulation, in general, is a dusty product. The smaller the attic is, the more concentrated the dust becomes. Reduce dust by turning down the airflow at the insulation blower machine. Start by reducing the air in number increments making sure the material flows mat least six inches from the end of the hose. Another second solution is to attach a misting system to the unit. This applies a very small amount of water during installation to significantly reduce dust.
8. Go Wireless
Dragging the insulation hose around the attic is a chore in and of itself. Adding a wired remote makes it even more cumbersome. Wireless technology is now available on many machines. Attach a wireless remote to easily navigate the attic without getting hung up on objects. The wireless remote can be attached to the body where it is easily accessed by the technician making installation easier and safer.
If you have any questions regarding the 8 basic installation tips or if you wish to locate a TAP® Provider in your area, please contact us.